How to Adjust Column Width in Excel: Step-by-Step (2024)
Do you find yourself scrolling back and forth in Excel?
The default column width might be the problem. Excel is an incredibly powerful tool for organizing and analyzing data. But sometimes, the default column width just doesn’t cut it.
Learn how to adjust column width in Excel with our step-by-step guide 😉
Spend less time scrolling and more time analyzing your data like a pro!
Table of Contents
Change column width of a single column
Changing column width is extremely easy and takes only a couple of seconds. Let’s see how to do it below.
Say, we have a sample data below.

We want to change the column width of column A.
To do that,
- Hover your mouse cursor over the right edge of the column header. The cursor changes to a horizontal double arrow.
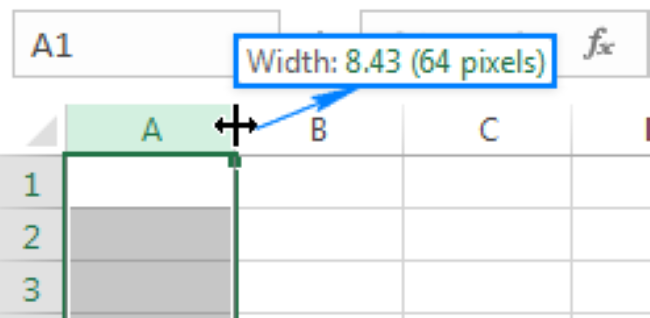
- Drag the column right or left to increase its width.
And it’s done 🤩

Or you can try another method as:
- Select the column header whose width is to be changed.

- Go to the Cells group and choose Format.

- Click the drop-down menu and select Column width.
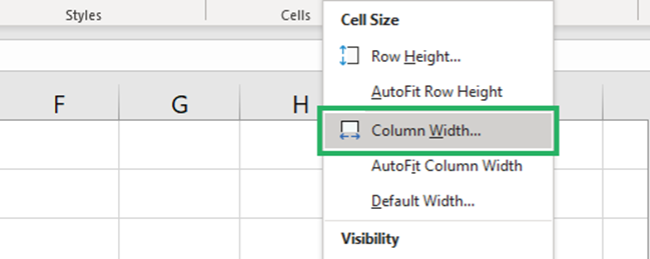
PRO TIP!
Alternatively, you can also select Autofit column width. This will automatically set the width of the selected column to where its data extends.
- The Custom column width box appears on the screen.
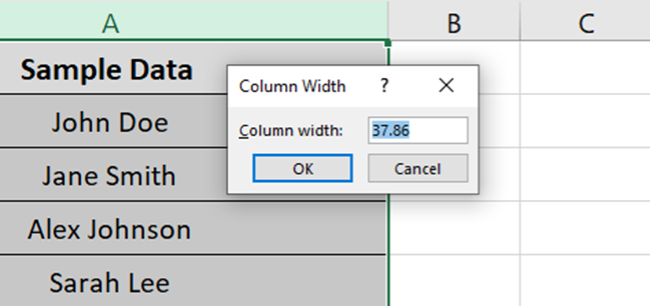
- Enter the width you want the column to be and press Ok – we entered 19.
- The column changes to the entered number as:
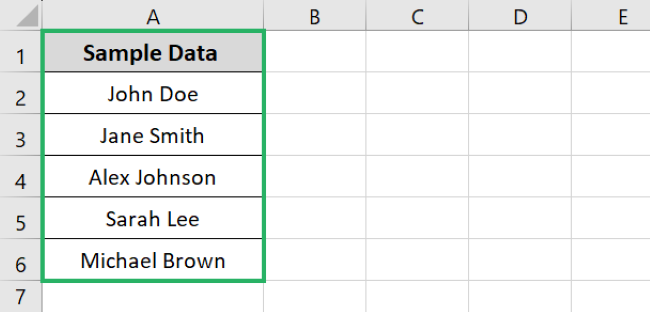
Pretty easy, no? 😎
PRO TIP!
You can also use a cool keyboard shortcut to change the column width. Select the column whose width you want to change and press the keys Alt + H + O + W.
The standard column width box will appear on the screen. Enter the width and press Ok.
You can also use a shortcut to autofit column width. For that, press Alt + H + O + I.
Change column width of multiple columns
Similar to what we did above, we can change the width of multiple columns in one go 🤓
Say, we have the following example data.
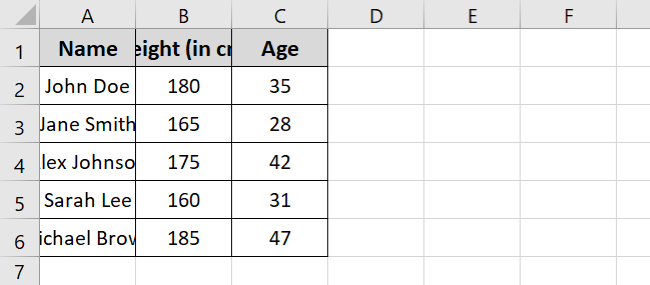
As evident, the data is very congested and it is difficult to understand. We want to change the width of all these column headers and make everything clear.
To do that,
- Select a cell from the columns and press CTRL + A.

- Go to Cells group > Format and select Column width. You can also use the shortcut ALT + H + O + W.
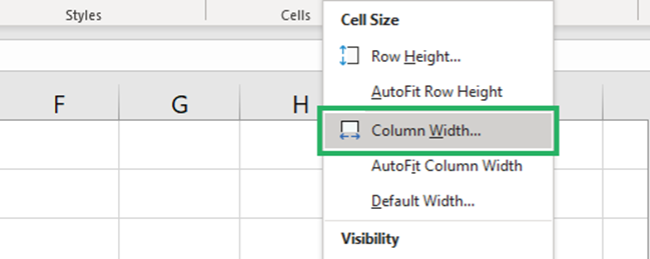
- The column width box will appear.
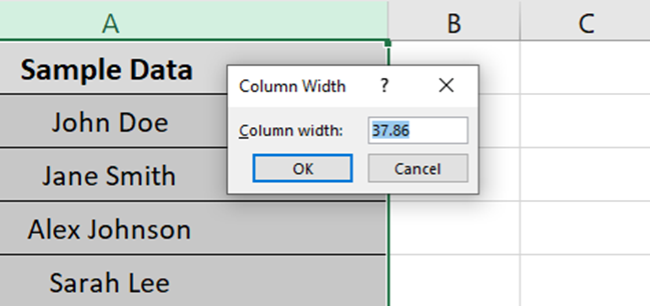
- Enter the desired width – 19 – and press Ok.
The columns will be set to the specified width:

Looks much more coherent now, no? Try it yourself 🧐
That’s it – Now what?
In this article, we saw how to change the width of a column in excel in seconds. We saw how to autofit column width and set column width for single and multiple columns.
Adjusting column width in Excel might seem like a small task. But it can completely change the overall look of your sheet.
By following this guide, you will be able to customize your Excel spreadsheet in no time ⌚
Excel has many other fantastic features to explore apart from adjusting column width. These features can really add to your Excel skills.
The most important of these are functions, and Excel has over 400 of them. The most important functions include IF, SUMIF, VLOOKUP, etc.
You can learn them for free in my 30-minute free email course that teaches this and more. It goes straight to your inbox only at the cost of your email address. So sign up now! 🚀
Other resources
Did you enjoy reading this article? If yes, then you’d love to read more.
Try similar topics: How to Add Column in Excel, How to Get a Column Number, and more.
