How to Transpose Data in Excel: Turn Rows into Columns (2024)
Did you ever happen to construct a data table in Excel? Where after it was all done, you realized that it would have made more sense the other way round?
In such a situation, don’t rush to recreate the table altogether.
Instead, you can turn the sides of your table with the transpose feature of Excel. And all it takes is a pair of clicks. 😀
Ready to learn all about transpose excel? Let’s dive into the article below.
To practice as you learn, download our free sample workbook here.
Table of Contents
Turn rows into columns with copy/paste (transpose)
This section applies where you have rows-long data that you want to be organized as Excel columns.
For example, take a look at the image below.
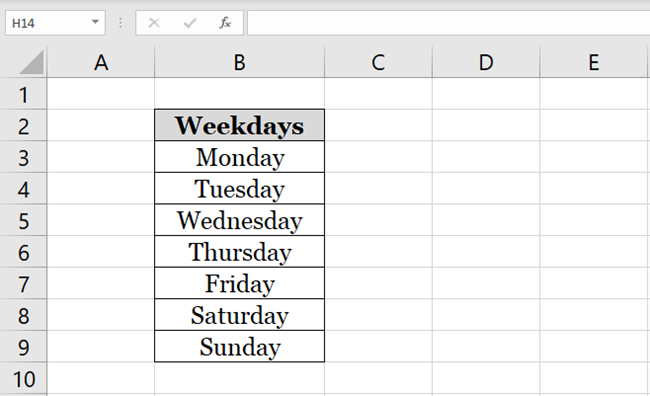
The image above has the seven days of a week in the shape of a row.
Can you turn this row into a column in Excel? Look below.
1. Select the data to be transposed (the row of weekdays).
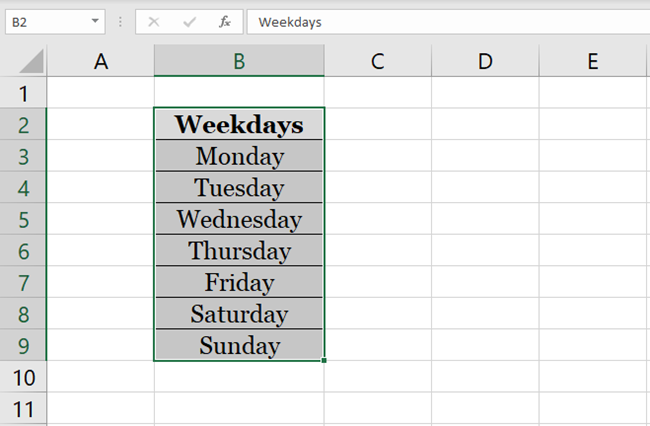
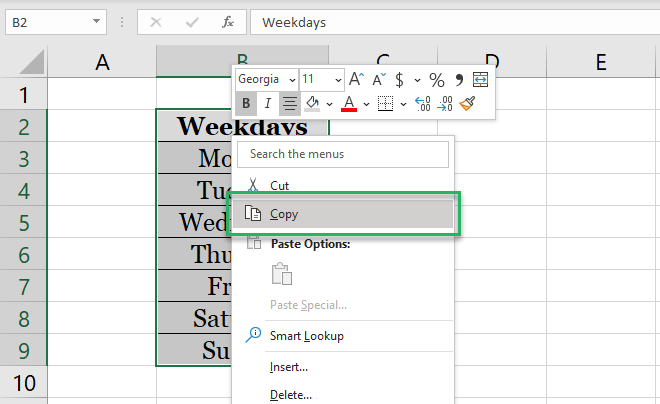
2. Right-click on the selection.
3. From the context menu that opens up, select Copy.
Or, select the row and press Ctrl + C.
4. Activate the destination cell (where you want the column to appear).
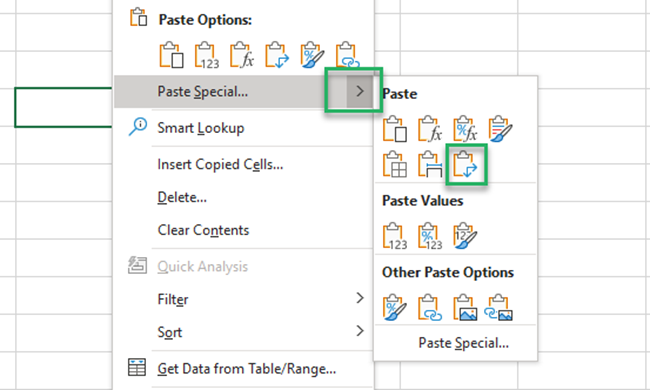
5. Right-click again to launch the context menu, as shown below.
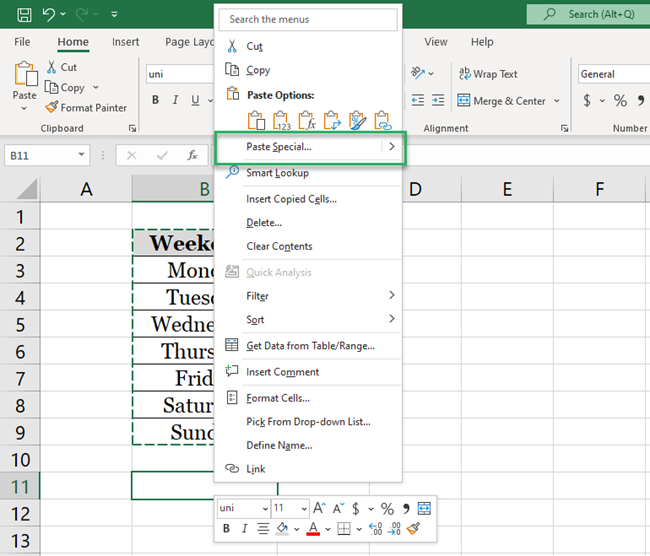
6. Click on the Option Paste Special under paste options.
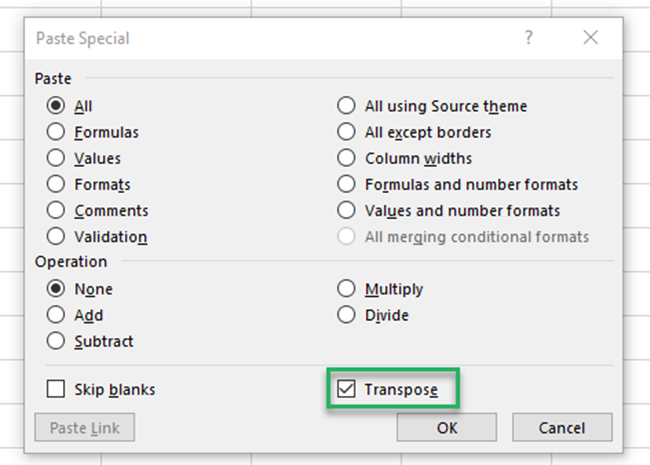
7. From the ‘Paste Special’ dialogue box, click ‘Transpose’ and click ‘Okay’
Pro Tip!
To save time, click the arrow next to Paste options. From the drop-down menu choose the icon with a two-ended arrow. ✌️
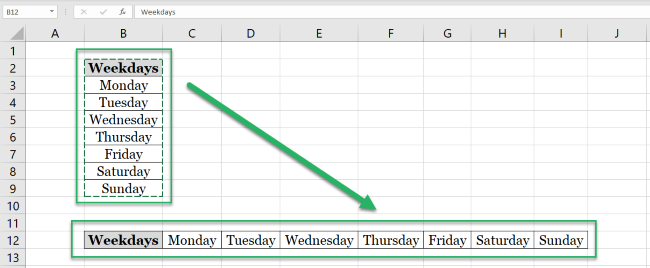
Here are the results.
The weekdays have now taken the shape of a column!
Turn columns into rows with copy/paste (transpose)
That’s how you can turn your row-oriented data into a column.
But does this work the other way around? Can you convert columns into rows?
1. Select the column containing the weekdays.

2. Right-click on the selection, and from the context menu, select Copy.

3. Activate the destination cell (where you want the row to appear).
4. Right-click again to launch the context menu.

5. Click on the Option Paste Special.
6. From the ‘Paste Special’ dialogue box, click ‘ Transpose’ and click ‘Okay’
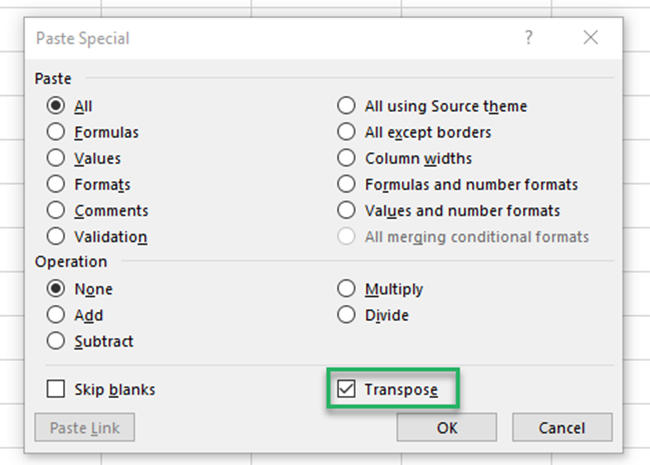
Ta-da! Excel converts columns to rows. 😎
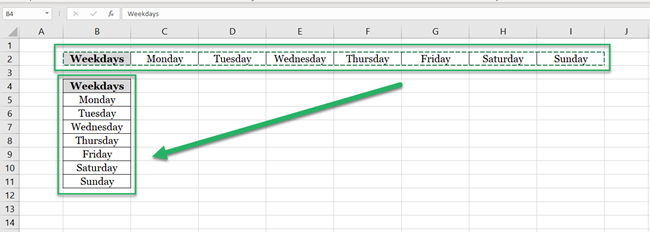
The transpose function hence works both ways.
Does transpose work on a table?
The above example was a simple one. We took a row and turned it into a column (and vice versa).
But what comes now is not only a row of weekdays but a whole timetable.
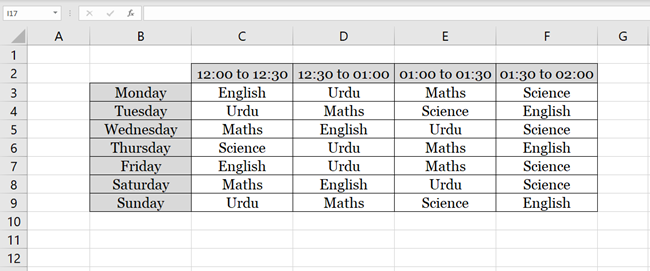
The above image shows different weekdays and time slots. For each time slot and each weekday, classes for different subjects are scheduled.
Presently, time slots are arranged in a horizontal range (in a row). And weekdays are in a vertical range (in a column).
To turn the table the other way around, follow these steps.
1. Select the table.
2. Right-click anywhere on the table to launch the context menu and select Copy.
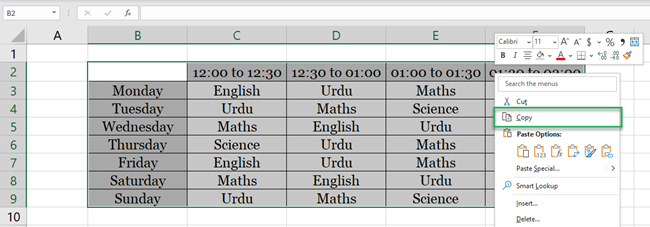
3. Activate the destination range (where you want the transposed cells to appear).
4. Right-click again to launch the context menu
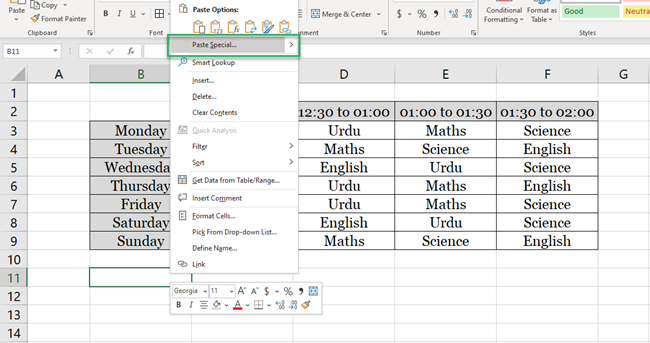
6. Click on the Option Paste Special.
7. From the ‘Paste Special’ dialogue box, click ‘ Transpose’ and click ‘Okay’
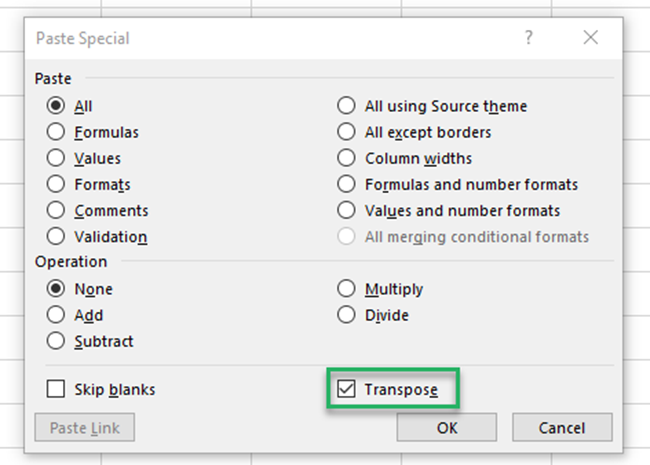
The table takes a whole new look.
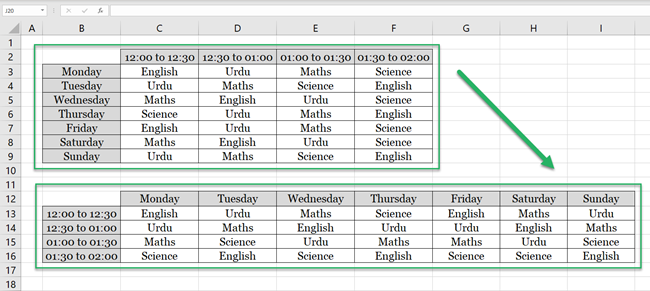
And here we have the transposed table.
Pay attention to see how the time slots are now organized in a vertical range. Similarly, weekdays take the shape of a row.
The data in between is also transposed accordingly.
Easy enough, isn’t it?
Transpose and keep references with the TRANSPOSE function
Everything seems good until here. But what if you want to retain a table in both the forms – before and after it is transposed?
This means you want to retain references to the source table. So that whenever you make a change to the source table, the transposed data changes accordingly and automatically.
To do so, the simple copy/paste feature of Excel won’t work. Instead, you’d need a dynamic function like the Transpose function.
For the same timetable.
1. Write the Transpose function in the destination cell as follows:
= TRANSPOSE (B2:F9)
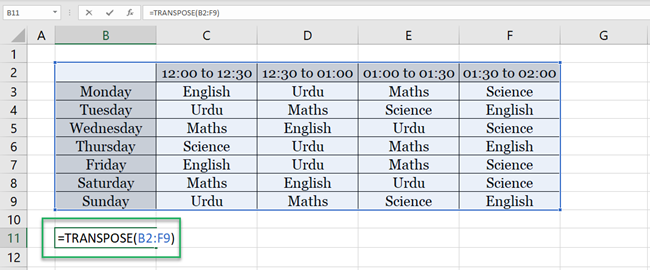
Select the entire cell range where the original data is placed.
2. Press Enter to have the table transposed.
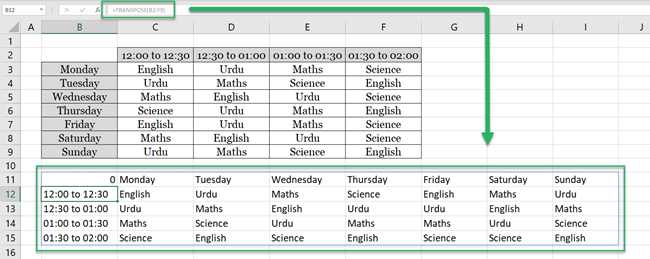
Excel has transposed the whole table (columns to rows).
How is it different from the copy/paste transpose feature?
Make changes to any cell in the source table.

Note how Excel automatically brings the same change to the transposed data.
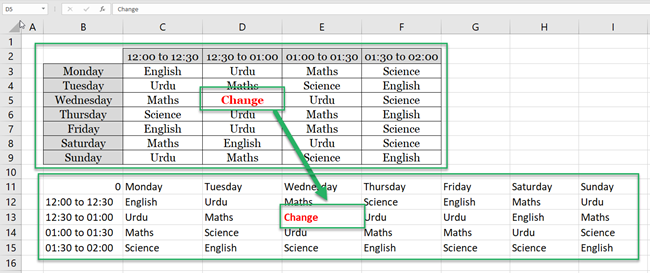
This is because the transposed cells retain the reference to the original table. If the source data in the original table changes, the transposed data would also change.
Transpose (Copy / Paste Special) vs. The Transpose Function
We have already seen two ways how you may transpose a given data set in Excel. Which one’s better? 🤔
Here’s a quick analysis:
1. The transpose function keeps references to the original data. Copy / Pasting lacks this functionality.
2. The transpose function is an array formula that returns an array. You cannot make changes to any individual cell of the array.

3. The transpose function reproduces the transposed data but misses out on the formatting of the original table.
4. Also, the transpose formula will turn any blank cells in the source data to zero (0). Refer to the top left cell of the table in our example.
And so you manually have to reformat the table.
That’s it – Now what?
The article teaches you how to transpose rows, columns, multiple rows, and multiple columns in Excel.
It also explains how to transpose a whole table through copy/pasting. And to transpose a table but keep references through the Transpose function.
Also, let’s not forget the analysis of which of the above methods suits us the best.
The transpose function is a handy one – but you might only use it once in a while. Some other very common and widely used functions of Excel include the VLOOKUP, SUMIF, and IF functions.
My free 30-minutes email course is all that you need to get the hang of these functions (and many more).
Other resources
You shall only be able to make the most out of the transpose function when used with other functions of Excel.
Excel offers many data pasting options including formulas only, values only, or formatting only. If you are only after organizing your data to bring it in a good shape, read out the article on how to sort your data in Excel.
