How to Delete Every Other Row in Excel (Fast & Easy)
While deleting a row is quite simple, deleting every other row in Excel can be time-consuming, especially when you’re working with large data sets. 😩
You need to manually select the alternate rows to delete them.
But nobody’s got time for that. ⏰
In this article, we’ll show you how to delete every other row in your Excel worksheets quickly and easily. 😎
Download this sample workbook we’ve created for you for this Excel tutorial.
Deleting Rows in Excel
To delete rows in Excel, you simply…
Step 1) Select the first row number you want to delete.
Step 2) Press Ctrl on your keyboard, and select the other row numbers you want to delete.

Step 3) In the Cells group of the Home Tab, click Delete.
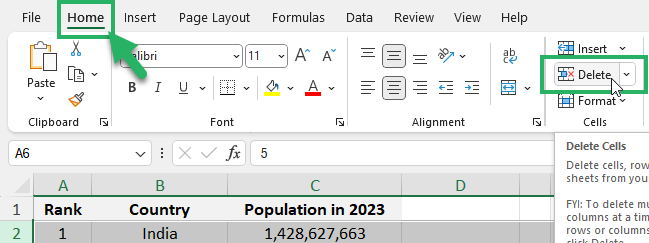
With small data sets, deleting alternate rows in your worksheets can be quick and simple. But when you’re working with large data sets, not so much.
However, it doesn’t mean there’s no other way, a faster way. ⚡
Delete Alternate Rows in Excel by Filtering
To delete alternate rows in Excel, first, you have to filter alternate rows, select them, then delete them at once.
It may sound easy but there are more steps to do this.
But we promise you, it’s less than manually selecting each row and deleting them. 😉
First,
Step 1) In a new column next to your original data, type Helper Column as its header name. In this column, we’ll add a sequence of zeros and ones.

Step 2) In the blank cell below, type the formula =MOD(ROW(),2)

Step 3) Press Enter, and drag the fill handle down to fill the rest of the cells.
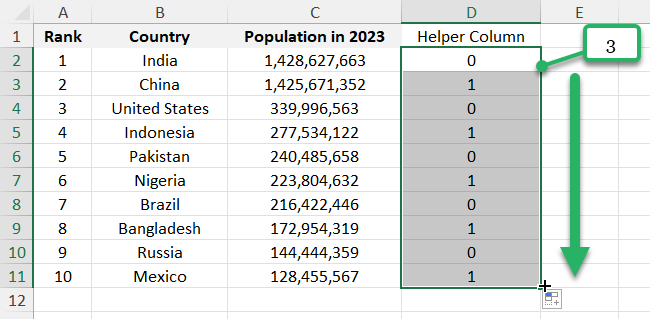
You’ll notice that the column is filled with a sequence of zeros and ones. 👀
Let me explain how the formula used above works.
First, the ROW function returns the current row number, then the MOD function divides it by 2.
The remainder is then rounded to the integer, showing either 0 or 1.
As a result, you have 0 in all even rows (because they are divided by 2 evenly without remainder) and 1 in all odd rows.
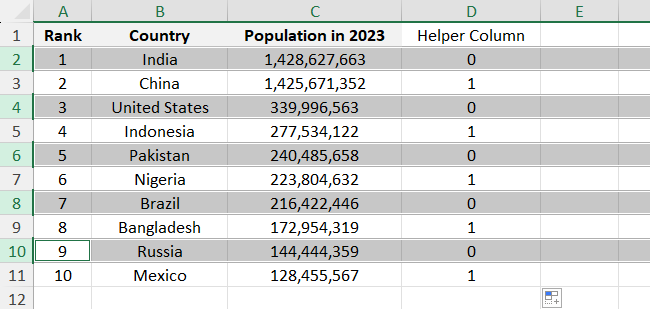
Let’s say you want to delete the even rows. We need to filter out the zeros in your Helper Column.
Step 4) Select your Helper Column.
Step 5) Go to the Data Tab.
Step 6) In the Sort & Filter group, click the Filter button. Drop-down filter arrows will appear in all header cells.
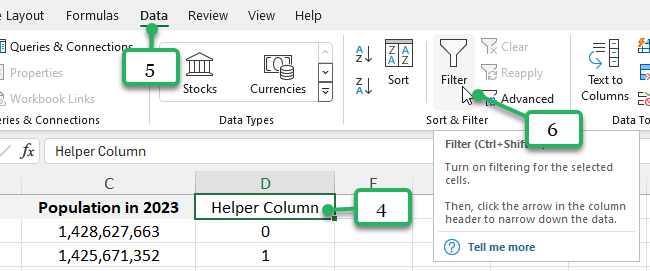
Step 7) Click the drop-down filter arrow in the Helper Column.

Step 8) Check 0 to delete even rows.
Step 9) Click OK.
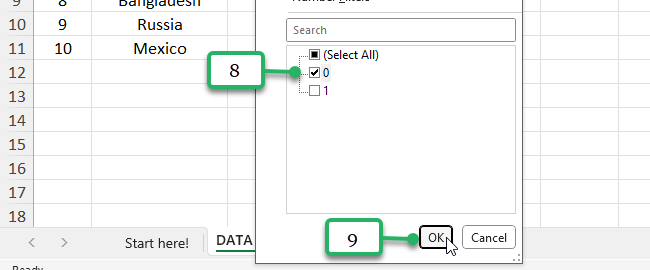
This will show you the “0” rows while the “1” rows are hidden.

Step 10) To delete, select all the visible “0” rows, right-click, and select Delete Row.
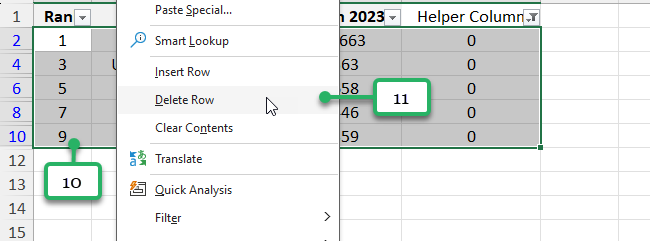
Step 11) A Microsoft Excel dialog box will appear. Click OK to continue deleting the rows.

You’ll see that no data is left in your worksheet. Not to worry, the other rows are still there. 🙌
To make them visible again, simply remove the auto-filter by clicking the Filter button in your Data Tab.
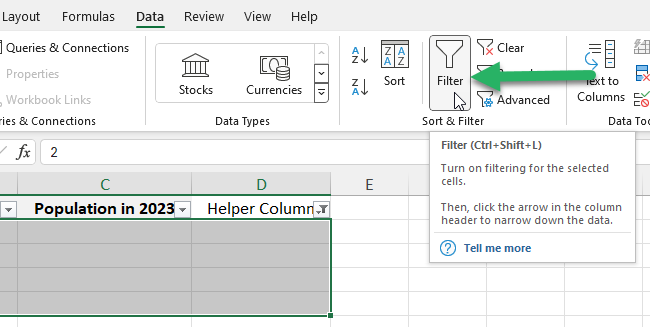
Notice that the formula in our Helper Column recalculates for the remaining rows (0 for even rows, 1 for odd rows).
As you’ve already filtered your previous data set, you don’t need this anymore. You can delete the Helper column to avoid confusion.

This is now the results. Only the even ranks are left in our Excel worksheet, the odd ranks are deleted! 😊

That’s It—Now What?
Well done! 👏
You’ve learned how to delete every other row in Excel by using Excel formulas and features.
With Microsoft Excel’s powerful features and formulas, you can definitely work faster and easier with your data. 🚀
Learn more about Excel formulas along with Excel tips and tricks with these related articles below:
