How to Remove Blank Rows in Excel
(3 Easy Methods)
Choosing the right method to remove blank rows in Excel is crucial – a wrong move can lead to lost data.
Method 1: Remove all rows that contain only blank cells
Method 2: Remove all rows that contain one or more blank cells
Method 3: Remove a few rows (quick method)
Method 1:
Remove empty rows that contain only blank cells
Using this method, a row is only considered blank if there are only empty cells in the row.

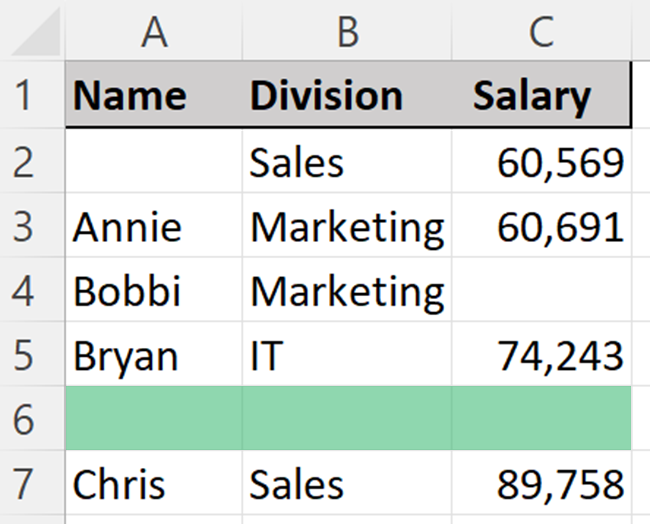
As you can see in this data set, only one row is completely blank, while the other two highlighted rows are partially blank.
This method removes the entire row 6 – but not row number 2 and 4.
Step 1) Select columns A, B, and C by dragging the cursor from A to C while holding down the left mouse button.
Step 2) Go to the Data tab and click the Filter button.

Now, you can see the filter buttons ![]() next to each of the column headers.
next to each of the column headers.
Step 3) Click the Filter button in column A. Then clear all the checkmarks by unchecking the (Select All) checkbox.

Step 4) Put a checkmark in the (Blanks) checkbox at the bottom and click OK.

Now, only rows that have empty cells in column A are visible.

Step 5) Repeat steps 3 and 4 for columns B and C.
This leaves only rows that are 100% empty.
Your file should look like this by now:

Step 6) Now select all the blank rows. Drag the cursor from the top visible row to the bottom visible row while holding down the left mouse button.
Step 7) In the Home tab, click the drop-down arrow below the Delete button and select Delete Sheet Rows.

Step 8) In the Data tab, remove the filter by clicking the Filter button again.

And your blank rows are gone! Well done🏆
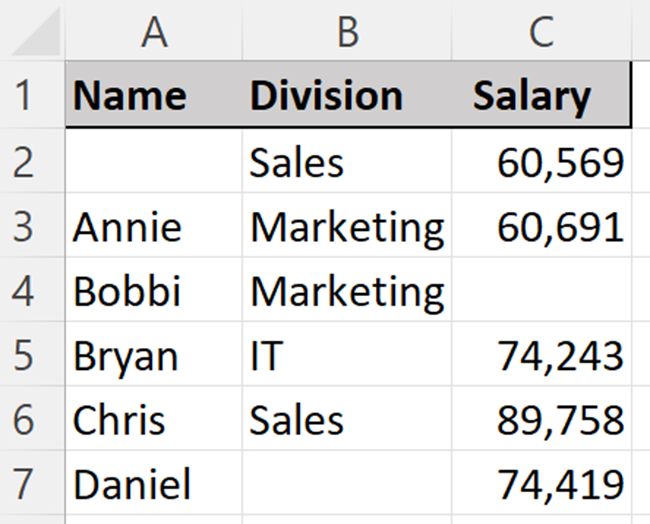
Note that you deleted all rows that contained only blank cells.
The rows that are partially empty are still visible👀
If you want to remove them too, check out method 2 below.
Method 2:
Remove rows that contain one or more blank cells
This method deletes rows in your data set if they contain one or more blank cells.

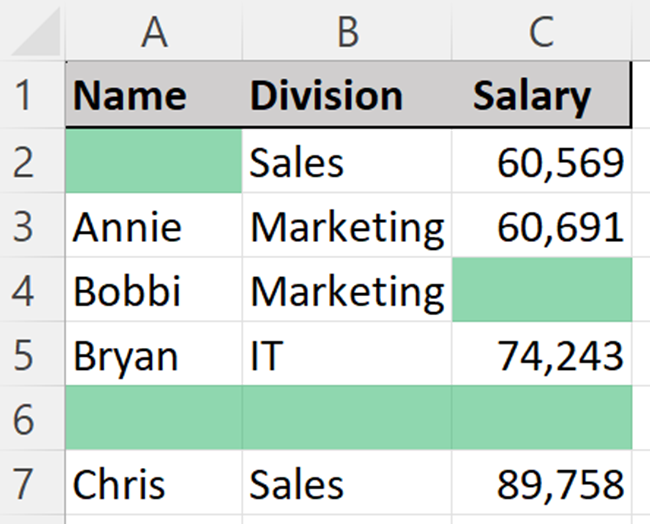
As you can see, all three highlighted rows are considered blanks, as they all contain at least one empty cell.
Step 1) In the Home tab, click the Find & Select button on the right side of the Ribbon.

Step 2) Click Go To Special.

Step 3) Select Blanks and click OK.
This selects only the blank cells in your data.

Step 4) From the Home tab, click the arrow below the Delete button and choose Delete Sheet Rows.
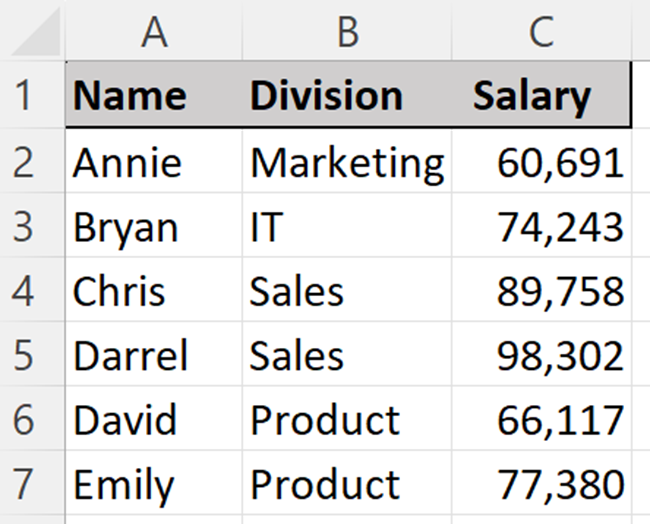
And that’s how to remove rows that contain one or more blank cells.
Well done🙌
Protip: Skip steps 1 and 2 by using the shortcut F5 to bring up the Go To dialog box and then click the Special button.
Method 3: Remove a few blank rows individually
If you need to get rid of a small number of blank rows, you can do it manually – one blank row at a time.
Right-click on the single row number for the row you want to delete.
Select Delete.

Then it’s gone!
Pretty easy right?
That way, you can assess whether the row is to be considered a blank row or not.
Obviously, this method takes way too long in big spreadsheets⏳
BONUS VIDEO:
How to delete blank rows
Want to see it in action? I’ve got your back👍
Here’s my video walkthrough of both method 1 and method 2.
You may also be interested in
- How Filters in Excel work (they can do much more than help you remove blank rows)
- Using conditional formatting to highlight text in your Excel sheet
- How to split cells in Microsoft Excel (YouTube video)
- Working with Pivot Tables
- My top-11 Excel keyboard shortcuts
- How to remove duplicates
- The 7 best Project Management templates
- How to only remove blank rows at the bottom

Written by Kasper Langmann
Hi, I'm Kasper Langmann👋
I'm the co-founder of Spreadsheeto, a certified Microsoft Office Specialist, and a Microsoft MVP.
With over 10 years of experience, I’ve taught Excel to millions of people worldwide.
I spent over 7 hours researching and writing this tutorial.
Last updated on August 29th, 2024.
Before you go, sign up for my free Excel course (+100,000 students) ->